Tabletop Officer Training Corps: One Weird Trick
Wednesday , 29, March 2017 Tabletop Games, Wargames 4 Comments If you’re looking for a relatively quick and easy trick to painting your miniatures, there’s really only one tool you need in your box – drybrushing. It is an easy technique will give you quick results that look great on the table. There are a host of painting methods that will add detail, depth, and museum quality effects to your miniatures. Washes as a smooth er finish, inks add more depth to your colors, and washes…well, to be honest, I don’t know what washes do, as I’ve never used them. Each of these painting methods has it’s uses and can make your figures the envy of the local convention scene, but when it comes to the metal meeting the tabletop, drybrushing is all you need.
Conveniently, it’s an easy technique to practice as well. Once you have your figures primed in black, line them up and grab your white paint. The brightest, purest white you can fine. Then dip your brush into the pot, and wipe of all but the faintest trace of it from the brush. You should have just enough to leave a dusting of color on your figure. With a light motion, drag the ‘dry’ brush across the raised portions of the miniature. You want to let the three dimensional nature of the figure do the work for you. If done right, it highlights all of the surface areas and leaves the shadowy nooks and crannies dark and, well, shadowy.

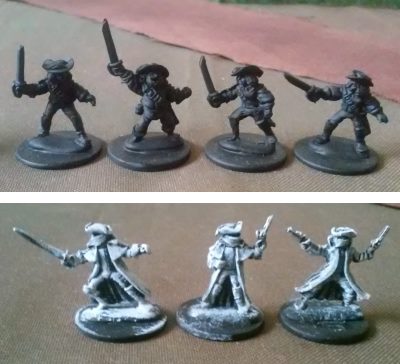
Before and after dry brushing the white undercoat
You’ll find that the harder you press the brush against the figure, the deeper the paint will penetrate into the crevices. You’ll also find that you need to go over each area of the figure more than once, with each pass of the brush making the white stand out brighter and brighter. In this manner, you can control exactly how bright you want your highlights to stand out. Note also that building up to bright white highlights will help the colors you’re going to add in the next step have a more layered and three dimensional look to them.
The beauty of this system is that dry brushing the white onto your figures first serves as an excellent Mr. Miyagi-like wax-on wax-off style introduction. You’re building up the muscle memory and the delicate touch you need for the following full color treatment.
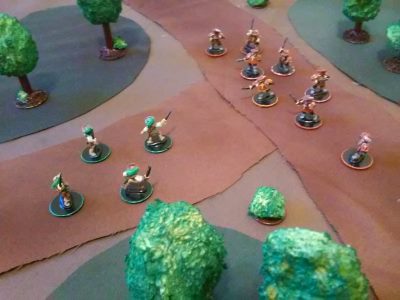
Once you have your figures highlighted in black and white, you can start adding in those colors using the exact same technique. Start with a darker color, and make sure you wipe out all traces of the white paint. Then, go over the darker color with a lighter tone, using a lighter touch to your dry brushing each time you lighten the tone. Doing so will give your figures a nice, natural shading and allow from high contrast dark lines between the colors that make them pop out on the table top. The following figures were painted using nothing more than this one weird trick, and while they might not win any trophies, they still represent a step up in quality from the pre-painted clicky figures.

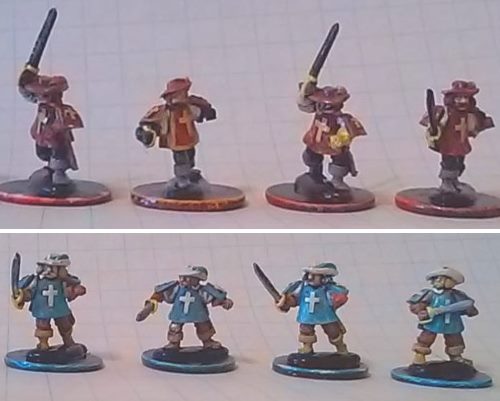
Above: The Cardinal’s Guard Below: The King’s Guard
Bear in mind that sometimes the best way to lighten a color is not to add white, but to add a little yellow. The color red in particular doesn’t highlight in pink tones. To add depth to the red cloaks of the Cardinal’s Guard, I hand mixed a little yellow into the same shade of red paint, and then brushed a bit around the edges of their cloaks to really define them. Had I used a pink tone, it would have dulled and muted the rich crimson colors.
You may find it easier to understand the method by watching a video of it in action. I’d recommend Doctor Faust’s YouTube video. Hot Lead also provides a quick tutorial that really shows how fast you can get great results. As mentioned in the videos, this technique is hard on your brushes. It will leave them frayed and worn – but frayed and worn brushes are prefect for the technique. So you’ll end up with two sets of brushes, one for standard work and one for dry brushing.

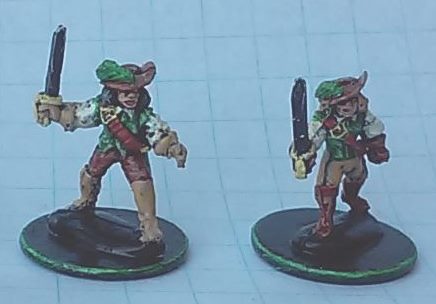
Two of the four Three Musketeers themselves
Speed, ease, and beauty, all achieved through this one weird trick that can be used for everything from humanoids, mounts, monsters, and vehicles. So don’t be intimidated by all of those award winning miniatures you see shown off around the internet. You can get results that look great almost right out of the starting gate, and in less time than you think. You’ll never again have to face the indignity of being one of those second rate wargamers that shows up to the shop with the travesty that is playing with unpainted figures.
Great post on dry brushing and I’ll have to try your tip on using yellow.
Also, the trick of paining the eyes and eye area black, painting over with white, then painting flesh over the white-bleed really does work. Painting pupils and eye-whites is no sorcery from the orient!
I’ve found washes good for a handful of things:
Brown and grey washes give you a more natural look to stone and wood, sometimes leather. I’ll use a brown wash on wooden shields or sometimes even pants.
Assorted washes are also good for skins, whether it’s making your barbarians look dirty or ruddy or your undead looking rotten or just if you’re trying to avoid having everyone have that stock base skin-tone.
Thanks for the tips! With that knowledge, I might actually think about painting some miniatures.